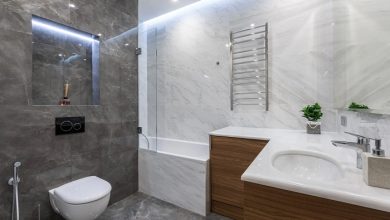
A successful bathroom remodel relies far less on the tiles visible on the surface than on the protective layers hidden beneath them. Water is persistent, seeking out microscopic gaps, shifting along structural framing, and saturating porous substrates over months or years before any visible damage reaches the living space. When moisture compromises a bathroom floor or wall, the resulting damage rarely stays confined to ruined drywall or loose tiles. It rots wooden floor joists, destabilizes subfloors, degrades wall studs, and can introduce persistent moisture against concrete foundation slabs that leads to mold colonies and costly structural repairs.
Protecting a home against structural water damage requires treating the bathroom as an interconnected, moisture-sealed envelope. Understanding the materials, critical transition points, and correct installation methods ensures water remains routed toward the drain and away from the bones of the house.
The Critical Misconception: Tile and Grout Are Not Waterproof
The most common and costly mistake in bathroom construction is assuming that glazed tile and cementitious grout form an impenetrable barrier. They do not. While high-density porcelain tiles absorb negligible amounts of water, standard ceramic tiles, stone surfaces, and all standard cement grouts are inherently porous.
Over time, structural settling, thermal expansion, and regular foot traffic create hairline fractures across grout lines. Water driven by shower pressure or standing on a floor enters these fissures through capillary action. Without a continuous, specialized waterproof barrier behind the tile layer, this water migrates directly into backer boards, subflooring, and wall cavities. Effective waterproofing must exist as a dedicated, standalone system installed directly beneath the tile assembly.
Preparing the Substrate for Maximum Stability
A waterproof barrier is only as reliable as the surface supporting it. Any structural movement, deflection, or unevenness under the membrane can stretch, puncture, or delaminate the material over time.
Assessing Subfloor Deflection
Before laying any underlayment or waterproofing, verify that the subfloor meets the required deflection standard for your chosen surface. Ceramic tile generally requires a floor stiffness rating of L/360 (the span length divided by 360), while natural stone often demands L/720 to prevent movement. If floor joists flex under regular load, movement will crack the mortar bed and compromise the waterproofing membrane. Reinforcing joists or adding an extra layer of exterior-grade plywood provides the rigidity necessary to prevent stress fractures in the waterproofing layer.
Selecting the Proper Backer Board
Traditional drywall has no place in a bathroom wet zone, and even water-resistant gypsum board (“greenboard”) is unsuitable as a direct tile backer in showers or tub surrounds. Wet areas require dedicated substrates:
-
Cement backer boards: Dense, inorganic panels that do not rot or lose structural integrity when exposed to moisture.
-
Fiber-cement boards: Blended panels offering high dimensional stability and a flat surface for thin-set mortar.
-
Waterproof foam building panels: Extruded polystyrene boards coated with a reinforced cementitious layer, providing both substrate support and built-in vapor retardation.
All seams between backer boards must be taped with alkali-resistant fiberglass mesh tape and embedded in modified thin-set mortar before applying any membrane.
Selecting and Applying the Right Waterproofing Membrane
Modern construction relies on two primary membrane categories to protect floors and walls: sheet membranes and liquid-applied systems. Both offer robust protection when applied according to the manufacturer’s precise technical specifications.
Sheet Membranes
Sheet membranes are factory-manufactured sheets of polyethylene or polypropylene with fleece webbing laminated to both sides. Because they are manufactured to a uniform thickness, they eliminate the risk of thin spots during installation. They are bonded to the substrate using thin-set mortar, with all seams overlapped by at least two inches and sealed with appropriate waterproofing adhesive or banded with dedicated waterproof sealing strips. Sheet membranes are especially reliable across expansive bathroom floors and steam shower assemblies where vapor transmission must be tightly controlled.
Liquid-Applied Membranes
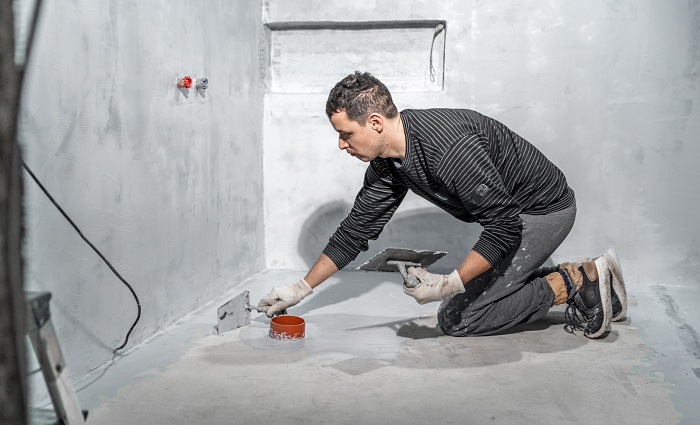
Liquid membranes are elastomeric coatings applied using a brush, roller, or trowel that cure into a rubber-like, seamless skin. Their primary advantage is the ability to easily coat complex geometries, such as shower benches, niches, and curved curbs. However, success depends heavily on applying the material to the correct wet film thickness (typically measured using a mil gauge). Applying the coating too thin leaves microscopic pinholes that leak under hydrostatic pressure, while applying it too thick in a single coat can cause surface cracking as it cures. Most installations require two distinct coats applied in perpendicular directions.
Fortifying Critical Transitions and Penetrations
Waterproofing failures rarely occur in the center of an open wall; they happen almost exclusively at corners, material transitions, and plumbing penetrations.
Sealing Changes of Plane
Every intersection where a wall meets a floor, or where two walls meet at an inside corner, represents an independent plane that shifts with structural settling and seasonal humidity changes. Rigid mortars and grouts always crack at these points. Waterproofing assemblies must bridge these joints using flexible elastomeric corner bands embedded in liquid membrane or specialized pre-formed sheet corners.
Protecting Pipe Rough-Ins
Water can travel backward along pipe sleeves into the wall cavity when showerheads, mixing valves, or body sprays are in use. Standard practice requires installing pre-formed rubber pipe collars or applying expanding silicone-based flashing around all rough plumbing penetrations. The escutcheon plate and trim kit installed later should be treated merely as cosmetic covers, not moisture barriers.
Shower Pan Assemblies: Slope, Drains, and Curbs
The shower floor represents the highest-moisture zone in any residential structure, demanding rigorous attention to pitch and drainage mechanics.
Maintaining Proper Slope
A shower substrate must feature a continuous downward slope of at least 1/4 inch per linear foot toward the drain. If a flat spot exists in the pre-slope, water will pool indefinitely beneath the tile, saturating the mortar bed, creating efflorescence, and degrading adhesives. For traditional multi-piece clamp drains, this slope must be formed in the mortar bed beneath the pan liner, not merely on the tile surface above it.
Keeping Drain Weep Holes Clear
In traditional mortar shower pans using a three-piece clamping drain, water that permeates the grout collects on the sloped membrane and trickles through small drainage weep holes located in the drain assembly. If mortar clogs these weep holes during construction, trapped water accumulates in the mud bed, generating foul odors, mold, and eventual subfloor saturation. Surrounding the weep holes with crushed tile spacers or pea gravel before packing mortar ensures an open path for sub-surface water drainage.
Treating Shower Curbs Correctly
Shower curbs are highly vulnerable to puncture. Fasteners should never be driven through the top or inside face of a shower curb when anchoring shower door tracks or backer board. Every mechanical puncture through the membrane at this level creates a capillary path for standing water to penetrate the curb framing, which eventually rots the adjacent subfloor and base plates.
Sealing the Perimeter and Managing Ambient Moisture
Waterproofing extends beyond showers and tubs. Overflowing sinks, toilet supply line leaks, and bath water splashes can quickly ruin standard plywood subflooring and soak into wall cavities.
Run floor waterproofing membranes at least two to three inches up the perimeter walls behind the baseboards. This shallow basin approach contains unexpected standing water from appliance leaks or tub overflows before it seeps beneath the wall plates into ceiling joists below.
Additionally, maintain a continuous bead of 100% silicone sealant where the floor meets the wall, where fixtures meet tile surfaces, and at all inside vertical shower corners. Unlike water-based caulks or rigid grouts, pure silicone maintains its elasticity under structural shifting and prevents water intrusion indefinitely.
Finally, adequate mechanical ventilation preserves structural framing by exhausting humid air before it condenses inside uninsulated wall framing or attic spaces above. Pair your physical waterproofing system with an exhaust fan rated to cycle the bathroom air volume completely according to industry guidelines, running it during every shower and for at least twenty minutes afterward to keep moisture levels balanced.