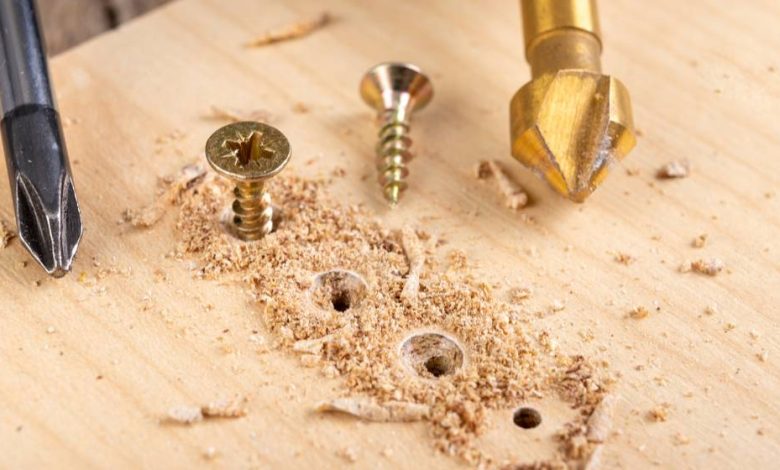
Particle board, laminated chipboard, and related engineered woods furnish the vast majority of modern homes. While flat-pack furniture offers clean aesthetics and accessible price points, its underlying material possesses distinct physical limitations. Unlike solid timber, which contains long, interlocking cellulose fibers that grip screw threads, particle board consists of sawmill shavings and sawdust bound together with synthetic resin under heat and pressure.
When a fastener in particle board is over-torqued, yanked, or subjected to continuous vibration, the brittle resin matrix simply crumbles. The screw does not merely slip out of its thread; it pulverizes the core, leaving behind a hollow cavity filled with loose dust. Pushing the screw back in or switching to a slightly wider fastener rarely works for long, as the surrounding core material has already lost its structural integrity. Restoring a stripped hole so it can hold substantial weight requires reinforcing the substrate itself.
Why Standard Wood Filler Fails in Particle Board
The immediate impulse for many homeowners is to fill the stripped cavity with standard water-based wood putty or drywall spackle. In an engineered wood assembly, this approach almost always ends in failure.
Standard wood fillers are cosmetic compounds designed to bridge surface nail holes and minor gouges prior to staining or painting. They shrink noticeably as their moisture evaporates, develop hairline cracks under load, and possess virtually zero tensile or shear strength. Driving a screw into cured wood putty inevitably causes the filler to shatter into chalky powder under the radial expansion of the screw threads.
A permanent repair demands materials that either physically interlock with the surrounding compressed wood particles or introduce an entirely new, solid anchoring base capable of withstanding mechanical tension.
The Wooden Splint and PVA Glue Pack
For light-duty fasteners, such as those holding drawer runners, shelf supports, or backer boards, filling the cavity with dense wooden splints embedded in cross-linking polyvinyl acetate (PVA) wood glue is the fastest and most accessible fix.
Step-by-Step Execution
-
Clean out the loose core: Insert a small pick, dental probe, or shop vacuum nozzle into the stripped hole to pull out all loose, pulverized sawdust. Applying adhesive to unanchored dust creates a weak bond.
-
Select your wooden shims: Use round bamboo toothpicks or hardwood skewers rather than soft flat toothpicks. Bamboo and hardwood skewers have dense, parallel fibers that offer exceptional resistance to screw expansion.
-
Saturate and pack the hole: Coat three to five toothpicks thoroughly with high-quality interior wood glue. Push them deeply into the hole until they hit the back of the cavity. Continue inserting additional glue-coated splints until the opening is packed so tightly that no more wood can enter.
-
Allow for a full cure: Wipe away any excess glue squeezed out onto the laminate surface using a damp rag. Let the repair cure completely for at least 12 to 24 hours. Cutting the curing process short will cause the wet splints to spin when you introduce the screw.
-
Trim and redrive: Once cured rock-hard, slice the protruding ends of the toothpicks flush with the panel surface using a sharp chisel or utility knife. Make a shallow center mark with an awl, and drive the original screw back in by hand.
The Hardwood Dowel Plug
When a hinge or structural joint strips out, the toothpick method may not deliver sufficient shear resistance. Drilling out the compromised area and inserting a solid hardwood dowel replaces the pulverized chipboard with real wood grain.
Begin by selecting a smooth birch or maple dowel measuring 1/4 inch or 3/8 inch in diameter, depending on the extent of the damage. Wrap a piece of painter’s tape around a matching drill bit to serve as a depth stop, ensuring you do not accidentally drill entirely through the opposite finished side of your furniture panel.
Carefully bore out the stripped hole using a sharp brad-point bit, which produces clean, straight-walled cylindrical holes without tearing up the delicate outer laminate. Vacuum away all debris, coat the inside of the hole and the dowel with wood glue, and tap the dowel into place until it seats against the bottom of the cavity.
After allowing the glue to cure for a full day, cut any protruding dowel flush with a flush-cut pull saw or a razor scraper, taking care not to scuff the surrounding laminate. Finally, drill a pilot hole into the center of the hardwood dowel that matches the root diameter of your screw (the shaft excluding the threads). Driving a screw into an unpiloted hardwood dowel inside particle board will wedge the dowel outward, risking a blowout in the surrounding panel.
Structural Two-Part Epoxy Putty
For severe blowouts—such as when a wardrobe door catches on an object and rips a massive chunk of core out around the screw hole—neither glue nor a round dowel will cleanly fill the irregular void. This scenario calls for a wood-repair epoxy putty.
Epoxy putty comes as a cylindrical stick with a resin exterior and an activator core. When sliced and kneaded together with gloved hands, it forms a pliable, moldable mass that cures via chemical reaction rather than air drying.
Before applying the epoxy, scrape away any loose particle board flakes until you reach firm, uncompromised substrate. Press the kneaded putty firmly into every crevice of the void, overfilling it slightly to account for final shaping. Ensure the epoxy bonds securely to the sound material at the perimeter of the blowout.
Most structural epoxy putties achieve working hardness in 30 to 60 minutes and full structural strength within a few hours. Once fully cured, sand or scrape the patch flush with the panel. Epoxy can be tapped, drilled, and sanded just like solid wood. Mark your mounting location, drill a proper pilot hole, and secure the hardware. The cured epoxy acts as a rigid, monolithic anchor that will not degrade under repeated load.
Installing Threaded Inserts
For joints that undergo constant stress or furniture that must be disassembled and reassembled periodically, switching from standard wood screws to machine screws and threaded metal inserts offers the most durable solution possible.
Threaded inserts are metal cylinders with deep, coarse knife-edge threads on the exterior and machine-screw threads on the interior. The external threads bite directly into the particle board across a wide surface area, spreading mechanical stress over a much larger footprint than a narrow wood screw ever could.
To install a threaded insert:
-
Drill a clean hole into the stripped location sized to the insert’s inner body diameter (refer to manufacturer guidelines).
-
Apply a small amount of wood glue or polyurethane glue to the external threads of the insert to lock it against the particle board fibers permanently.
-
Thread the insert into the pre-drilled hole using an Allen wrench or a flat-blade screwdriver, ensuring it sits perfectly flush with or slightly below the surface.
-
Fasten your furniture hardware using a standard machine bolt matched to the internal threads of the insert.
Critical Rules to Prevent Future Stripping
Once you have repaired the stripped joint, adopting better fastening habits will protect the engineered wood throughout the rest of the piece.
First and most critically, retire the cordless impact driver. High-torque power tools drive screws with violent rotational pulses that easily overpower particle board resin in a fraction of a second. Always perform final tightening by hand using a standard manual screwdriver. When you feel the screw head make firm contact with the hardware bracket, give it an additional quarter-turn to snug it down, and stop immediately.
Second, if you ever notice a fastener beginning to feel loose or wobbly, attend to it immediately. A slightly loose screw allows the attached hardware to flex and act as a lever against the hole. Every time the door swings or the drawer slides, that lever action crushes the delicate internal particles. Addressing minor movement early prevents full blowouts, keeping your furniture sturdy and functional for years to come.